MAKE A KUMIHIMO BRACELET
KUMIHIMO BRACELTS
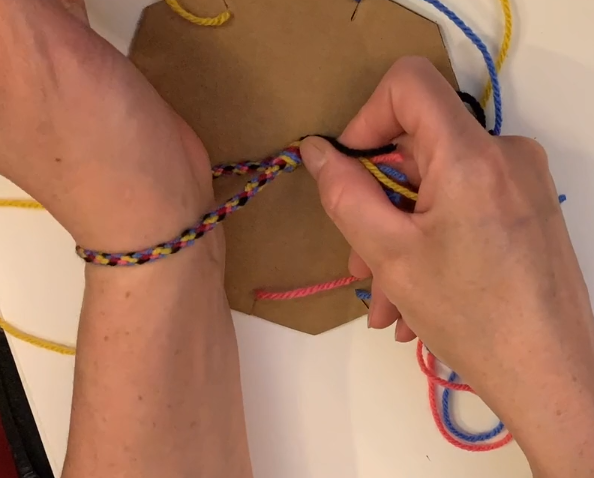
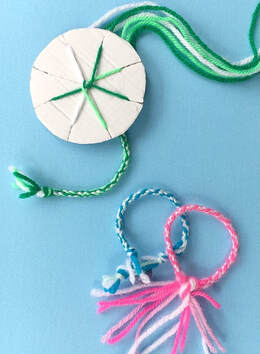
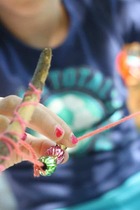
Overview: Kumihimo is a Japanese word that roughly translates into “braided cords.” It is a traditional technique that uses a round or octagon disk to create a round weaving instead of a flat weaving as seen in a traditional friendship bracelet. I hope you have fun making your own Kumihimo bracelet!
Overview: Kumihimo is a Japanese word that roughly translates into “braided cords.” It is a traditional technique that uses a round or octagon disk to create a round weaving instead of a flat weaving as seen in a traditional friendship bracelet. I hope you have fun making your own Kumihimo bracelet!
Materials: Cardboard, scissors, pencil & yarn or embroidery thread
- Cut 7 strands of embroidery string or yarn each approximately 20 inches long.
- Tie a slip knot in one end by taking all 7 strings together and make loop around your finger at one end and pull the ends through the loop.
- Cut a piece of cardboard into a 3-4 inch octagon and make a short cut (about ½ inch) into each side.
- Using a sharpened pencil, carefully poke it through the center of the cardboard octagon, making sure it’s large enough to pull your yarn through, but no larger than the knot at the end.
- Pull your yarn through the center hole until it hits the slipknot and stops.
- Place one color yarn in each cut slit around the edges of the octagon.
- Put the empty slit facing you.
- Take the sting in the third position and place it in the empty slit.
- Turn the cardboard so the new empty slit is facing you.
- Take the string the in third slit in the empty slit and turn cardboard.
- Continue repeating this 4-5 times.
- After the 5th rotation, pull the knot GENTLY down under the cardboard to help the bracelet start to grow.
- Keep repeating until you get to the end of your yard and pull off loom.
- Finish with a slip knot.
----------------------------------------------------------------------------------------------------
Make a Bead and Pinecone Mobile
Overview:
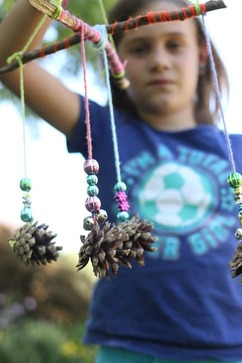
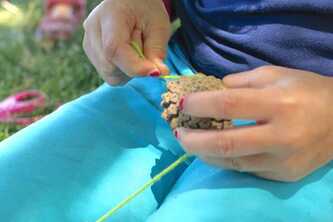
Mobiles are a type of sculpture that are formed by different components which are suspended in the air and move in response to air currents. Mobiles use the principle of BALANCE. The weight of the objects suspended are evenly distributed throughout the mobile. This project will introduce you to one way of creating a mobile using some items you can find in your yard!
**Please know there are many ways a mobile can be achieved! If you can’t find the materials needed for this mobile-try creating with different materials ;)
Materials:
2 sturdy sticks approx. 1ft long
Yarn
Beads
Scissors
5 (or more) Pinecones
Steps:
1. Go for a nature hunt to find your sticks and pinecones.
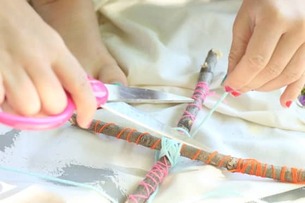
2. To make the hanger for your mobile, begin by wrapping your sticks with yarn. Make sure to tie knots at the beginning and the end.
3. Criss-Cross your sticks to form an “X” shape and secure by winding yarn where the sticks intersect.
Mobiles are a type of sculpture that are formed by different components which are suspended in the air and move in response to air currents. Mobiles use the principle of BALANCE. The weight of the objects suspended are evenly distributed throughout the mobile. This project will introduce you to one way of creating a mobile using some items you can find in your yard!
**Please know there are many ways a mobile can be achieved! If you can’t find the materials needed for this mobile-try creating with different materials ;)
Materials:
2 sturdy sticks approx. 1ft long
Yarn
Beads
Scissors
5 (or more) Pinecones
Steps:
1. Go for a nature hunt to find your sticks and pinecones.
2. To make the hanger for your mobile, begin by wrapping your sticks with yarn. Make sure to tie knots at the beginning and the end.
3. Criss-Cross your sticks to form an “X” shape and secure by winding yarn where the sticks intersect.
4. Tie 5 pieces of yarn to the “X” that will hang below. The pieces can vary in length to give visual interest but they need to be long enough to add beads and pinecones!
*NOTE-more yarn pieces can be added for more pinecones or if you want some with just beads :)
5. Chose beads you want to add to your mobile and string one piece of yarn at a time. Tie a knot at the end to secure beads. Make sure to leave a long tail underneath the beads to attach pinecone.
*NOTE-more yarn pieces can be added for more pinecones or if you want some with just beads :)
5. Chose beads you want to add to your mobile and string one piece of yarn at a time. Tie a knot at the end to secure beads. Make sure to leave a long tail underneath the beads to attach pinecone.
6. Attach pinecone by wrapping tail of yarn around a few times, making sure the yarn is snug within the scales.
7. Lastly, to be able to hang your mobile, tie a piece of yarn to each end of the intersecting sticks and knot all together at the top.
---------------------------------------------------------------------------------------------------
Fluffy Slime Time!
**Messy Project Alert**
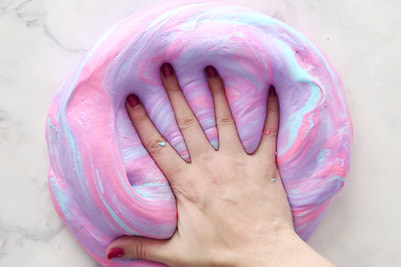
Have you ever made SLIME? Wait until you feel the texture. It is soft, squishy and fluffly. Fluffly slime is regular slime but with shaving cream. The more shaving cream you add the fluffier it gets!! Ask your adult to help, gather the materials, a place mat or table cover & Give it a try!!
Have you ever made SLIME? Wait until you feel the texture. It is soft, squishy and fluffly. Fluffly slime is regular slime but with shaving cream. The more shaving cream you add the fluffier it gets!! Ask your adult to help, gather the materials, a place mat or table cover & Give it a try!!
Materials:
Adult to help mix and measure
A Bowl
2/3 cup of Elmer's White Glue ~ Elmer’s glue is the BEST for slime
½ teaspoon Baking Soda
¼ cup of Water
2-3 cups of Shaving Cream ~~ do not use shave gel
1 ½ Tablespoons contact solution ~~must have boric acid so check the label
Optional: Liquid food coloring
Adult to help mix and measure
A Bowl
2/3 cup of Elmer's White Glue ~ Elmer’s glue is the BEST for slime
½ teaspoon Baking Soda
¼ cup of Water
2-3 cups of Shaving Cream ~~ do not use shave gel
1 ½ Tablespoons contact solution ~~must have boric acid so check the label
Optional: Liquid food coloring
Steps:
SLIME PICTURES AND MAYBE A VIDEO WILL BE ADDED THIS WEEK
- Add white glue to the bowl
- Add water and baking soda and MIX
- Add Shaving Cream and MIX
- Add food coloring and mix until you like the color
- Slowly add in a tiny bit of the contact solution and MIX then add more
SLIME PICTURES AND MAYBE A VIDEO WILL BE ADDED THIS WEEK
--------------------------------------------------------------------------------------------------------------------------
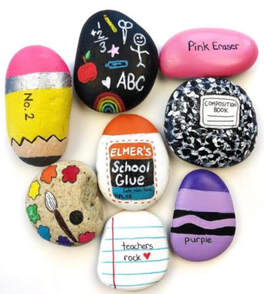
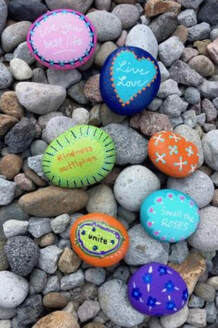
Rock Painting
Materials:
Rock, paintbrush, paint (acrylic works best), and optional Modge Podge to seal it. |
|
Steps:
1. Clean all the dirt off of your rocks and let them dry.
2. Decide what you are going to create – a picture, an animal, a fun saying… it’s all up to you!
3. Begin painting your rock with the designs and colors of your choice. If you like, you can draw some lovely pictures using magic markers instead of paint.
4. When you are all finished decorating and the paint is completely dry, it’s time to seal the rock. You want to paint a very light coat of Modge Podge over the entire surface.
--------------------------------------------------------------------------------------------------------
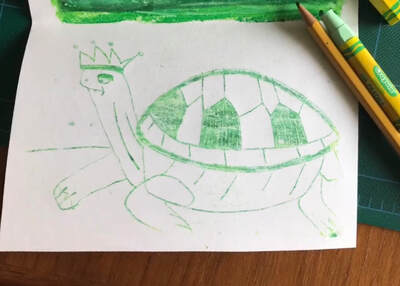
Magic Oil Pastel Transfer Drawing
Materials:
Drawing paper, Oil pastels and pencil.
You can use crayons or oil pastel for this transfer project.
You can use pencil or ballpoint pen for the drawing.
Steps:
Drawing paper, Oil pastels and pencil.
You can use crayons or oil pastel for this transfer project.
You can use pencil or ballpoint pen for the drawing.
Steps:
- Fold your paper in half.
- Choose several hues of one color (dark green, light green, yellow green) or analogous neighbor colors (magenta, purple and blue) from the color wheel.
- Color one half of your paper. Layer the pastels blending the color. Fill in all of the white spaces.
- Choose something to draw, be creative.
- Fold the colored half of paper over to the blank cover. Draw with a pencil or pen. whatever you draw will transfer color to the blank page.
- Tip: If you don’t want to draw on the back of the colored page, you can draw on another blank piece of paper held down on top of the pastel coloring.
- If you make a mistake forgive yourself and keep working.
-----------------------------------------------------------------------------------------------------
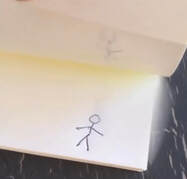
How to Make a Flip Book Animation with Sticky Notes!
--------------------------------------------------------------------------------------------------------
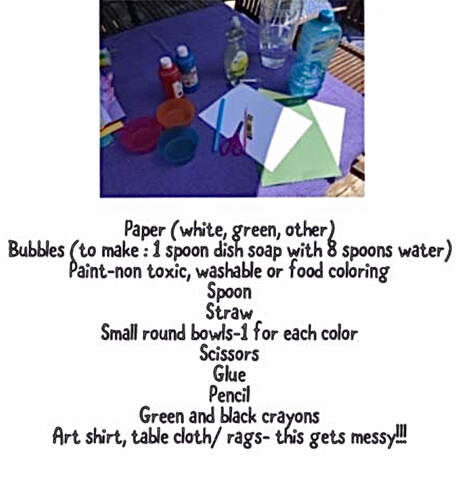
How to make Bubble Hydrangeas

---------------------------------------------------------------------------------------------------
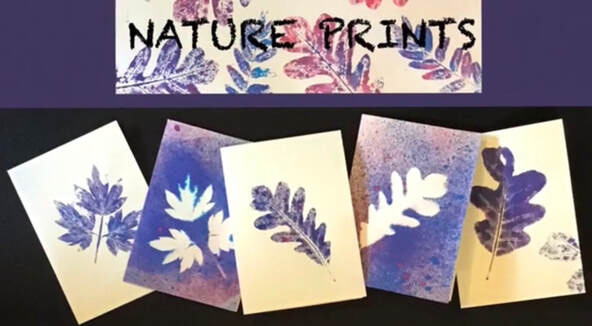
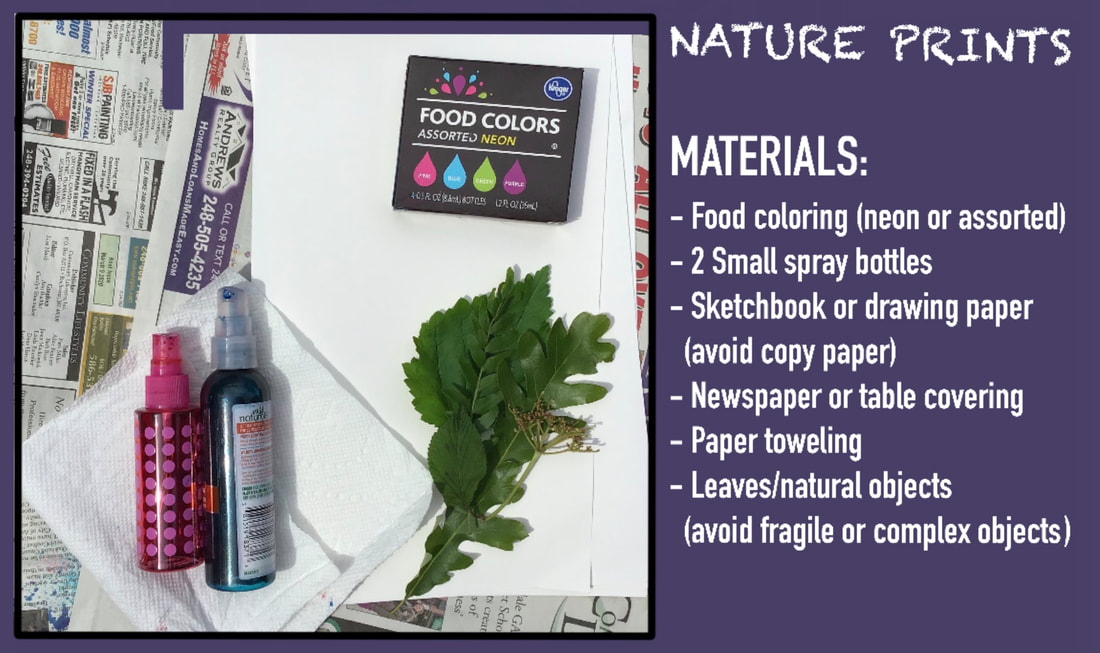
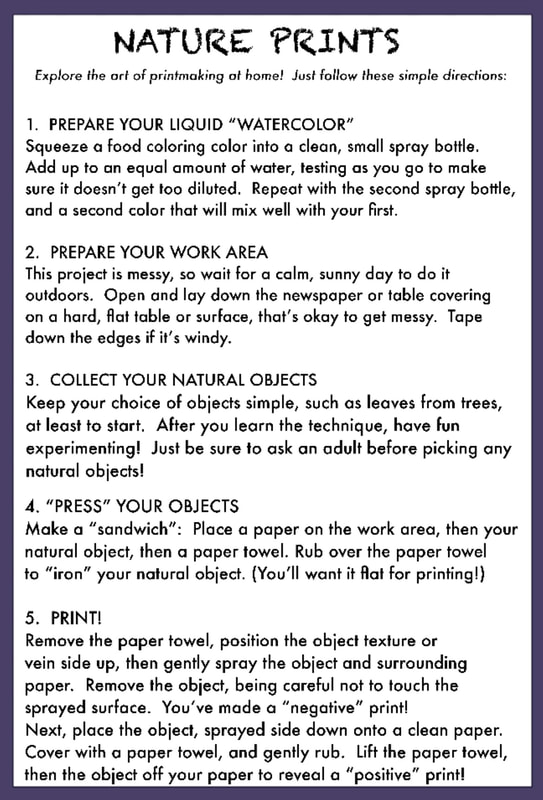
How to make Nature Prints
Silhouette Landscape
Using the app Autodesk Sketchbook see if you can create a silhouette landscape! Perfect for a rainy day!

What if Lines could jump off your paper?
Color Wheel Scavenger Hunt
Can you find objects that match every color on the color wheel? Want more of a challenge see if you can find the items outside!
-----------------------------------------------------------------------------------------------------
A List of Summer Drawing Ideas!
Check out the list of ideas below to help you think of things to draw!
------------------------------------------------------------
------------------------------------------------------------
|
|
Please continue to share your creations with your art teacher!
Photo used under Creative Commons from Alexxx1979
